Shout3D™ 2.5 - User Guide

home previous
next contentsShout3D™ 2.5 - User Guide
|
|
The Shout3D Wizard is a Java application that is used for previewing and publishing Shout3D content. It automates the process of creating HTML files with the appropriate <APPLET> tags for previewing on your local system. It also generates optimized files for publication on a Web server.
The best way to become introduced to the Shout3D Wizard is to take the Wizard QuickStart Tutorial.
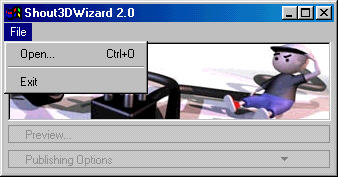
The Shout3D Wizard is a Java application, but Windows and Mac users will be able to launch it from a standard executable file. Other users must run the Wizard from a command line in an installed Java runtime environment.
java shout/tools/wizard/Shout3DWizardIf you can not successfully launch the Shout3DWizard, check the system requirements.
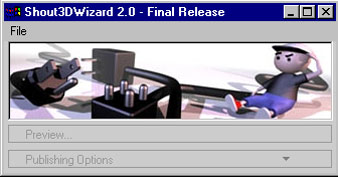
When it starts up, the application will look like this:
 A file picker dialog box will appear.
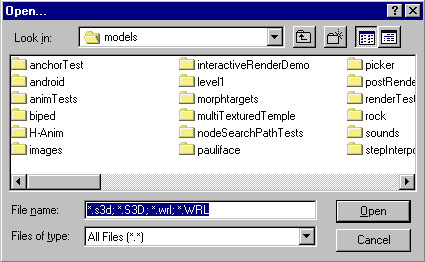
Select a file and press "Open". The name of the loaded file will appear in the title bar.
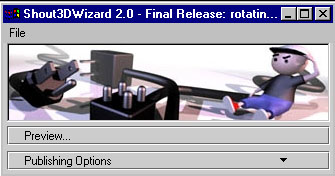
Once a file has been loaded, the Preview... and Publishing Options buttons are enabled. The Shout3DWizard will remember your last model directory each time you run the Shout3DWizard.
Press the Publishing Options button to reveal the dropdown menu.
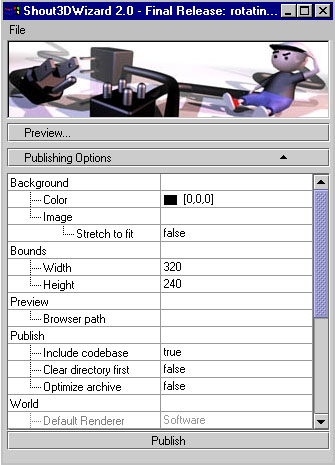
Scroll through the menu to review all of the options. Most of the options pertain to the appearance of the content, and are therefore as important for previewing as for publishing. In general, these options set applet attributes or parameters that are discussed more thoroughly elsewhere in this User Guide.
The following options set applet attributes or parameters:
wooden_stage_bg.jpg in the models\images\shared directory. (default = none) If you already have a Background node in your scene file (perhaps because you created a background in MAX), don't set this option as it will override your existing background.
StillCamProgAntialias {}
.class file, not the source code (e.g., ExamineApplet.class, not ExamineApplet.java or ExamineApplet). (default = Shout3DApplet.class).
The options you set (other than Applet type and the background parameters) are saved in a file named wizard_settings in your Shout3d_wizard directory, and will be used automatically the next time you launch the Wizard. You can delete this file to cause the Wizard to return to its defaults.
Once you've set your options, you can preview by pressing the Preview button. A temp_preview directory will be created within the codebase directory, containing an HTML file and a directory with the scene file and other necessary resources. This HTML file will be automatically loaded into a browser for viewing.
Each time you press the Preview button, the temp_preview directory is reconstructed, and thus reflects any changes made to the scene file or resource files since the last preview.
Previewing occurs in your default Web browser. If you wish to choose a different browser for previewing, or if the Preview tool is not functioning because it is unable to find your default browser, you can set your Browser path in the Publishing Options panel. Find and select Netscape (Netscape.exe), Microsoft Internet Explorer (IExplore.exe) or appletviewer.exe.
When you publish a selected applet with the Shout3D Wizard, a published directory is created that contains all of the files needed for uploading to a Web server. Before pressing the Publish button, you must consider the following Publishing Options:
The Published directory is structured to be uploaded to a Web server as a single unit. Your HTML page will almost certainly contain other content in addition to the Shout3D applet. You can add that content to the HTML file in the Published directory, and rename the HTML files as well. If, on the other hand, you are copying the <APPLET> tag from an HTML file in the Published into another HTML file, you'll need to move the finished file into the Published directory before uploading.
If you do not upload the Published directory as a single unit, you must be certain that the CODEBASE attribute in the <APPLET> tag correctly describes the path from the HTML file to the codebase (the directory that contains the shout3d, applets and custom_nodes directories).
In the interests of safety and completeness, the complete applets and custom_nodes directories in your Shout3D installation are copied to the Published directory. You may choose to delete unnecessary class files from these directories before uploading.
NOTE: It's important to understand that the Wizard can only publish resources (3D scene information, bitmap images and sound files) that are included in the .s3d or VRML 97 scene file. If your applet uses additional assets, you must make sure to copy these files over independently. This applies to assets that are loaded as the result of programmed user interactivity, as well as to assets that may be used by scene nodes that are created (instantiated) directly in custom applet or panel classes. For example, you may create a project in which user input will cause one bitmap to be replaced with another that is not already in the scene file. All of the bitmaps that the project requires should be collected together in the Published directory before uploading to a server. Similarly, if users are given the power to load a new scene into an applet (with the loadURL() or setSceneFromURL() methods), all of the alternative scene files must be included for uploading.
By creating an optimized archive, you package precisely the Java class files needed by a given applet in a single unit that can be downloaded in a single transaction. This is the most efficient approach to publishing. If you do not create an optimized archive, the standard shout3dClasses.zip archive will be downloaded by users. It will likely contain unnecessary class files and lack others that are needed by the applet, and these must be downloaded individually. Despite the fact that the Optimize archive option is false by default, you will typically want to set it to true.
When you press the Publish button with the Optimize archive option set to true, a preview window will appear with your applet loaded. This previewing process is necessary to identifying the classes needed by the applet. Let the preview load completely and test every aspect of user interactivity provided in the applet. Then close the preview window. When you do so, a custom .zip archive will be created and written to the Published directory. In some cases, the preview may fail to evidence all aspects of your applet correctly, but the .zip archive will nonetheless be correct. In any event, any classes that fail to be included in the archive will be downloaded separately. Thus your applet will always work for users.
Shout3D 1.0 used Java 1.02 so as to support the Netscape 3 and Microsoft Internet Explorer 3 Web browsers. Shout3D 2.5 uses Java 1.1, and will therefore run only on Netscape and MIE 4.0 and higher. This change was made to incorporate advantages of Java 1.1 that far outweigh the loss of the small (and diminishing) user base that is still using the oldest generation of browsers.
Netscape 4.0+ and MIE 4.0+ support compressed scene files. Thus it is no longer necessary to publish uncompressed .s3d and .wrl files, either alone or as an option. As a result, the Wizard will generate only a single compressed .s3z file by default. If you wish to use your uncompressed scene file in the publication process, set the Optimize scene option to false.
Shout3D 1.0 users may also notice that the Convert to .s3d option in the Wizard has been eliminated. In Shout3D 1.0, the .s3d format was only a compacted (though not compressed) version of an original .wrl file, in which whitespace and any non-compliant nodes were eliminated. Shout3D 2.5 can load only a single type of file, regardless of whether it is named with a .wrl or a .s3d extension. All that matters is that it is in the correct format and contains only nodes supported by Shout3D. There is no longer any need for conversion from .wrl to .s3d, and all compression is to files with an .s3z extension (regardless of whether the originals were .wrl or .s3d).
![]()
Copyright© 1999-2001, Shout3D LLC.